Its a good idea to have different physical name servers for your websites for better redundancy. If you are using cPanel to host your websites, it is plain simple to setup a fully working DNS cluster.
In this tutorial, we’ll be setting up a DNS cluster in cPanel.
Besides your main cPanel server, you will need two additional servers or VPS. To lower the risk even more, we can setup these servers from different hosts or locations. As with cPanel, these should be running the CentOS operating system.
You can get cheap $5 per month 512MB 1GB droplets from Digitalocean and install CentOS 6 on it.
Install cPanel DNSONLY
After you have setup your server, its time to install cPanel’s DNSONLY software. Its a watered down version of the normal cPanel/WHM software. You do not even get a DNS zone editor, but that’s fine. You won’t be editing any zones on these servers manually.
cd /root
mkdir cpanel-dnsonly
cd cpanel-dnsonly
curl -o latest-dnsonly -L https://securedownloads.cpanel.net/latest-dnsonly
cPanel states that you need a minimum of 768MB ram to install the software and if your server does not have that required ram, installation will quit with an error. However my DNS servers never use more than 200MB. Maybe it is required for the installation/compiling. Anyway, you can hack the installation process to accept your 512MB ram.
Run the bash script with the keep switch.
sh latest-dnsonly --keep
After running the above command, a new installd directory will be created inside the /root/cpanel-dnsonly directory. You need to open the install file inside and change the following to as below.
my $min_memory_rules = {
    default => 256, # changed this to 256 from 768
After that, you need to run the below file in the same folder (/root/cpanel-dnsonly/installd)
./bootstrap-dnsonly
Setup DNS Cluster
Once the cpanel DNSONLY software has finished installing, you open your browser and go to
https://server-ip:2087
The username will be root and the password will be your server’s root password.
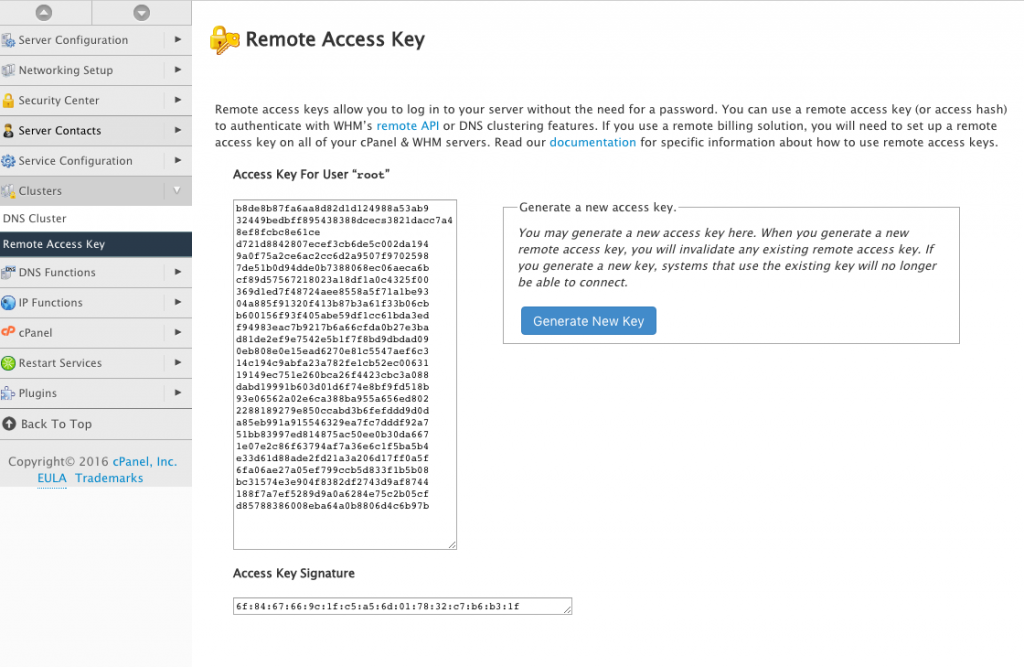
Once logged in, go to Clusters > Remote Access Key and generate a new key. This key will be used by your main server to access the DNS server.
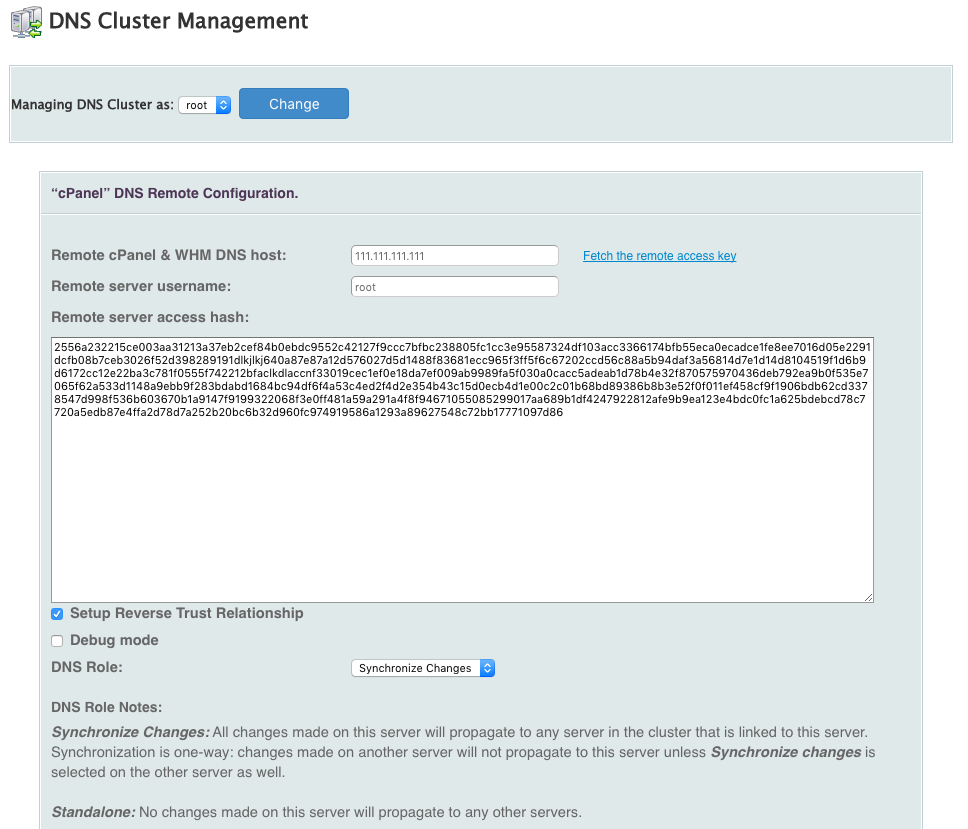
Now login to your main cpanel server and go to Clusters > DNS Cluster. You should now click on Enable DNS clustering and add a new server to the cluster. Choose cPanel as the backend type. You need to enter your DNS server’s IP address and the remote access key that you copied earlier from your DNS server.
Tick Setup Reverse Trust Relationship and choose Synchronize Changes as the DNS role. With this setting, your main server will push changes to your DNS servers.
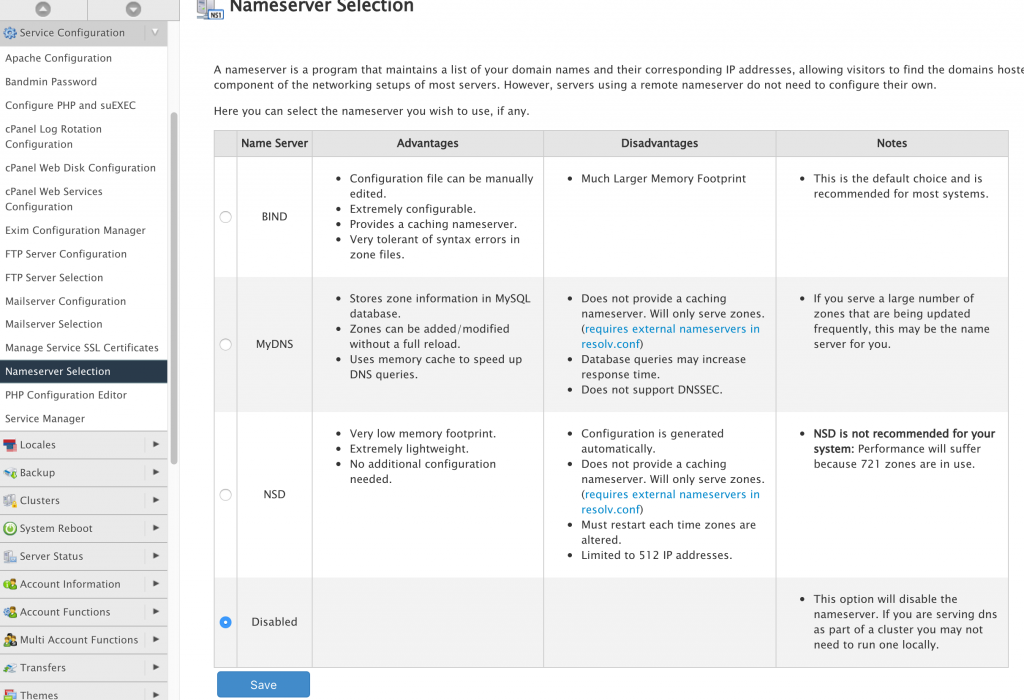
Repeat the process to add the second DNS server. Once that’s done, you can now disable BIND on the main cpanel server by going to Service Configuration > Nameserver Selection. It will not be used as a DNS server any more, but only push DNS records to the separate name servers in the cluster. This way, you will free up resources used by BIND.
You now have multiple DNS servers which automatically stays in sync with your accounts in the cpanel server.


